SwiftUI for Mac - Part 1
15th December 2019 • 1,543 words • 8 minutes reading time.
So far, nearly all the articles I have seen about SwiftUI show it being used for iOS, more particularly for iPhone. But SwiftUI works on all Apple's platforms, and as I am primarily a Mac developer, I decided to try out a Mac app and see what happened.
Setup
I opened up Xcode and created a new project selecting the macOS App template. The project opened at the usual ContentView.swift but there were a few differences in the project structure as well as one in the ContentView struct.
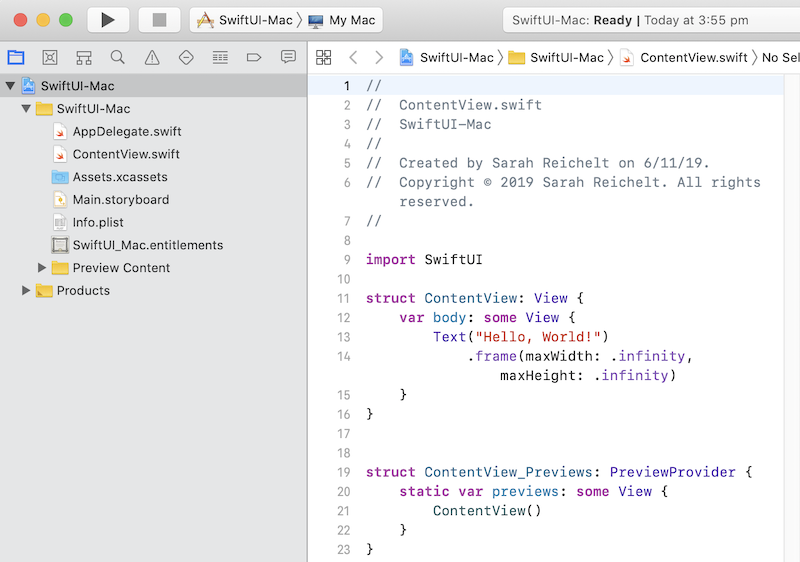
The first thing to notice is that the default "Hello, World!" Text view has a frame set:
.frame(maxWidth: .infinity, maxHeight: .infinity)If I removed this frame modifier, the preview display in the Canvas changed so that the view was only the size of the text instead of being a standard window size. I guess an iOS device always knows what size it is, but a Mac window can be any size, so you have to be more explicit to stop SwiftUI shrinking the container view to the minimum size possible.
The next thing is to look at the files that are included in the project. There is no SceneDelegate.swift as you would see in an iOS project. And to my surprise, there was still a Main.storyboard file! And going to the General settings for the app target, I could see that this storyboard was selected as the Main Interface.
Opening it up reveals that this is where the application menu is configured. I had wondered where the menus were configured in Mac SwiftUI apps.

The AppDelegate was the next thing I looked at and here I found some of the code that I would have expected to find in a SceneDelegate. The applicationDidFinishLaunching(_:) method creates an instance of ContentView, creates an NSWindow and uses an NSHostingView to display the ContentView inside the window. At this stage, running the app gives me what I would expect: a fully-fledged Mac app with a window and a menu, both with all the functions you would expect in any standard Mac app.
The Canvas
I was not expecting the Canvas to be much use when it came to previewing a Mac app. It works so well with an iPhone app because the iPhone is tall and thin and fits neatly into one side of the code window. But a Mac view is likely to be much bigger, so it would have to be scaled down a lot to avoid talking up too much precious space in my Xcode window.
But it works as expected, and even scaled down, you get a good idea of the layout while still getting the live reloading that is part of what makes developing in SwiftUI so much fun.
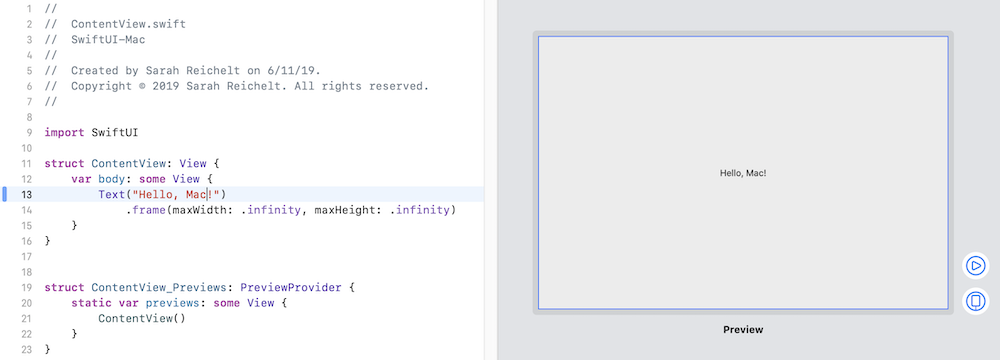
But here is where I got my first real surprise, with a feature that I had not seen yet in any SwiftUI tutorial or article. Click the Live Preview button and see what happens...
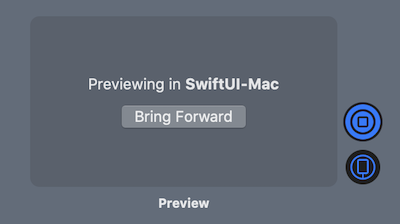
Of course I clicked "Bring Forward" and there was my app running in a window called "Xcode Preview". There was an app in my Dock and when I chose "Show in Finder", I found that the app is buried deep in DerivedData. Positioning my windows so I could type in Xcode while watching this preview window, I saw that it instantly updated my view as I typed, just like an iPhone in the Canvas.
If I changed the structure of the view, the app closed and re-opened immediately with the new content. This is amazing and shows that the Xcode & SwiftUI teams really thought about how to use these new features in Mac apps as well as iOS.
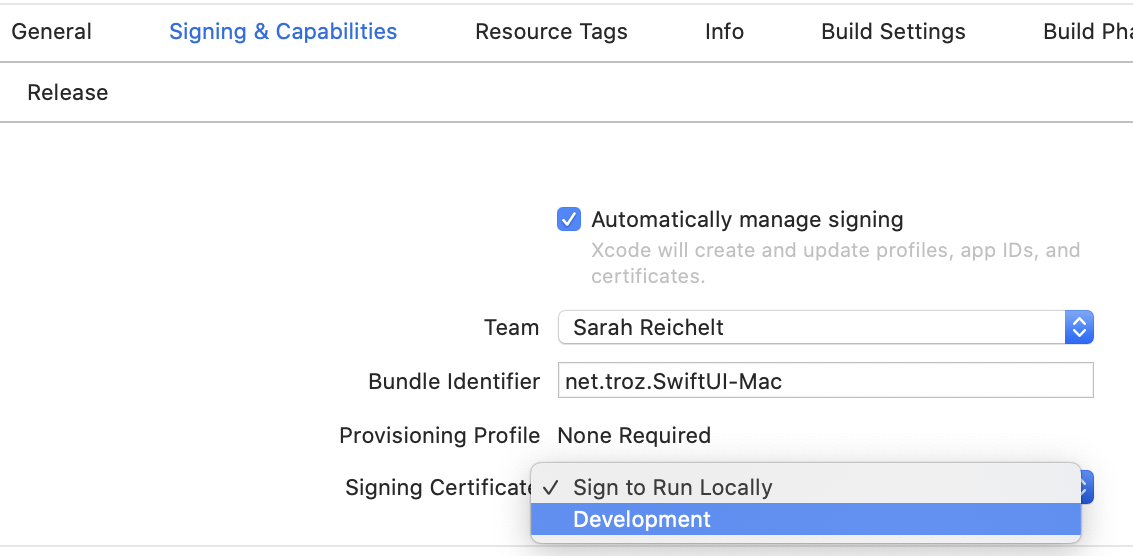
In Xcode 11.3, I found that I was having trouble with the previews. They would not display and above the Canvas, I got the super helpful message "Cannot preview in this file --- SwiftUI-Mac.app may have crashed.". It turned out that this was a signing issue. If you go to the app target and look in the Signing and Capabilities section, check that Signing Certificate is not set to "Sign to Run Locally". If it is, switch to "Development" and the previews will start working again.
Laying out the View
Now that I have the project and I know how to preview it, it's time to work out what to display in the app. The next real app I want to work on will use a master-detail layout, so that is what I decided to try here.
Before worrying about the data, I decided to try populating the master view with a static list and using that to navigate to a detail view that was simply a Text view.
struct ContentView: View {
    var body: some View {
        NavigationView {
             List {
                 ForEach(1 ... 10, id: \.self) { index in
                     NavigationLink(destination: Text("\(index)")) {
                         Text("Link \(index)")
                     }
                 }
             }
        }
    }
}
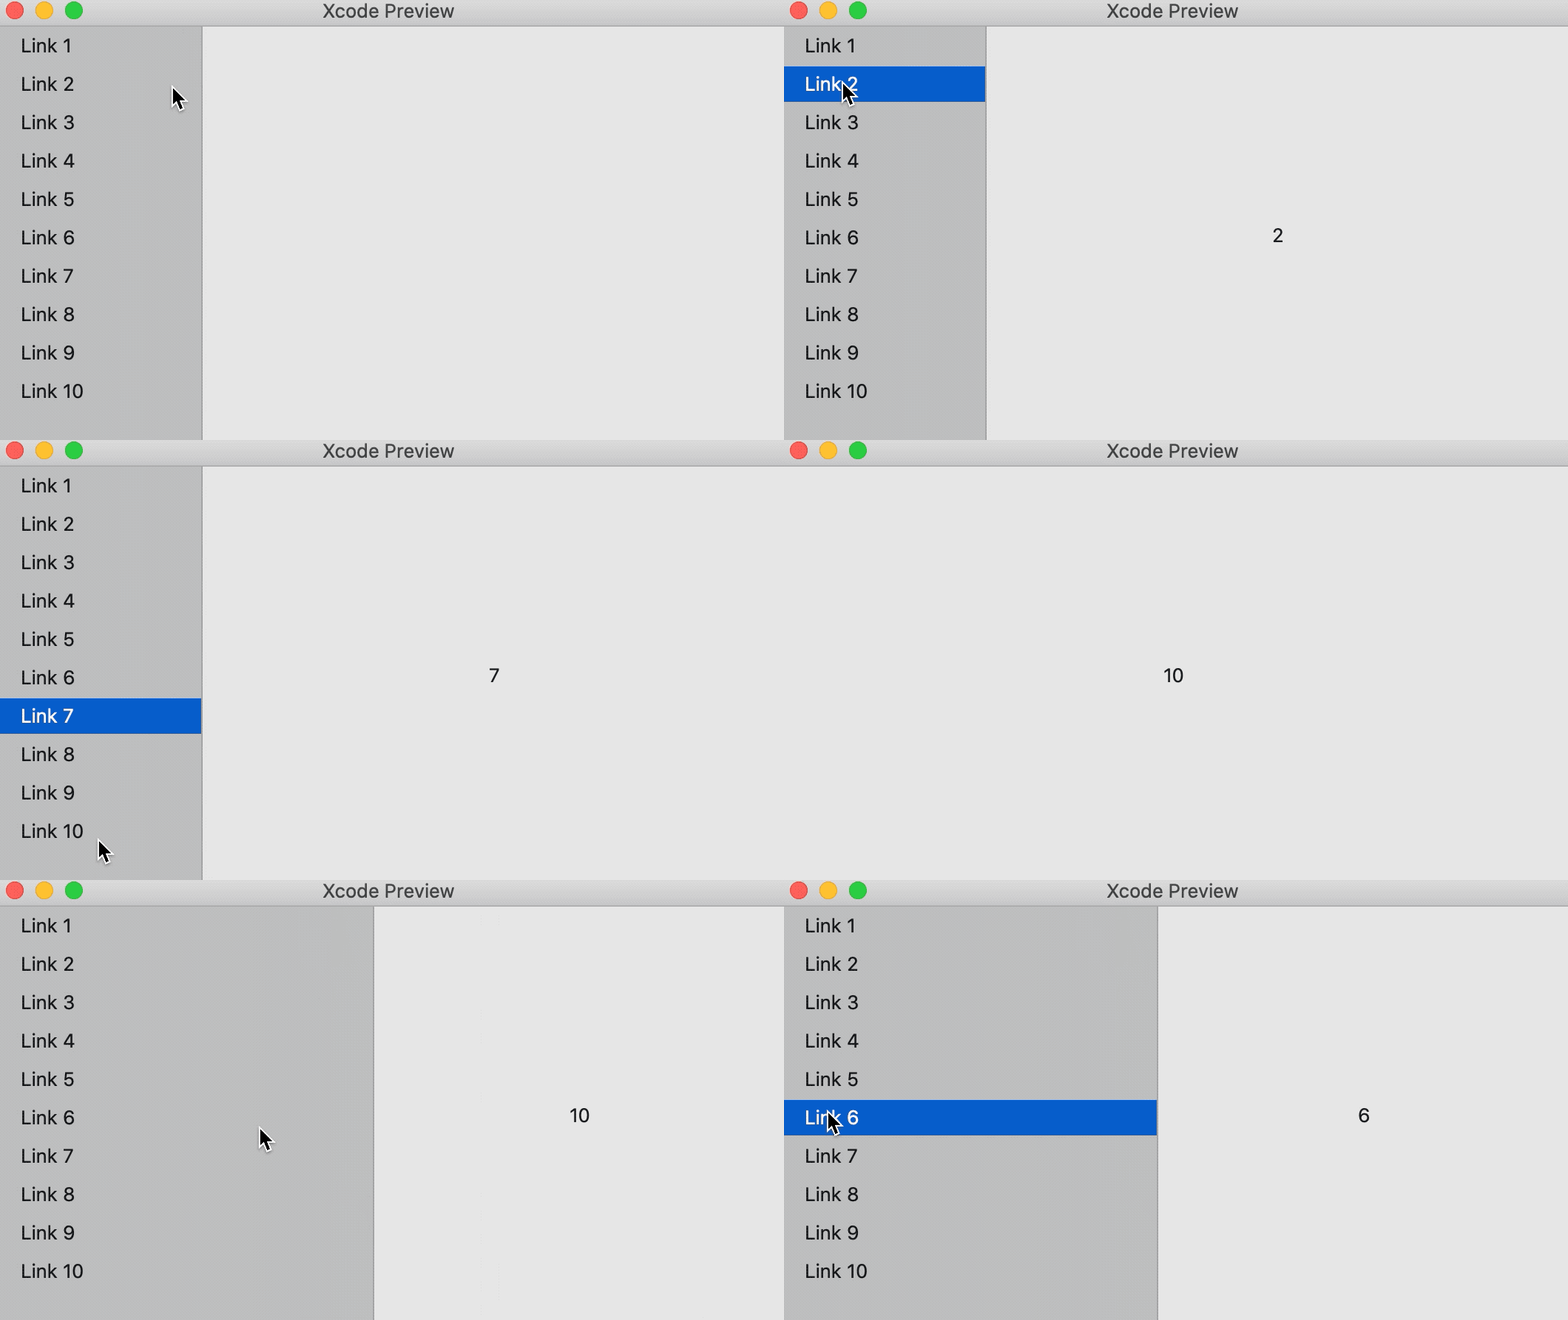
This worked, except that the left column was only about 20 pixels wide. But I was able to use the mouse to drag it wider and there were my List entries. Clicking on one did indeed show the detail I wanted, but it shrunk the window to one line high!
The first thing I did was to apply a listStyle modifier to make it show the semi-transparent Mac sidebar. This fixed the width of the sidebar. But the whole window still shrunk when I selected an item.
.listStyle(SidebarListStyle())I tried applying the frame modifier to the NavigationView and that made the window stay the same size, but the content still shrunk into a tiny section in the middle. It looks like I need to apply that frame modifier to the detail view as well.
.frame(maxWidth: .infinity, maxHeight: .infinity)And as you can see from this gif, I then had a full functional master-detail view with a collapsible and expandable semi-transparent sidebar.
Adding Data
After some scouting around for a free API that I could hook into, I came across HTTP Cats which is a site that serves up a cat image to match almost every HTTP status code.
This sounded ideal: I can list the codes in the master view on the left and display the image in the detail view on the right.
First I created a JSON file to list all the HTTP status codes so that I could put them into a List view. This was a very simple array with each entry having a code and a title:
[
  {
    "code": "100",
    "title": "Continue"
  },
  {
    "code": "101",
    "title": "Switching Protocols"
  },
  ...
]
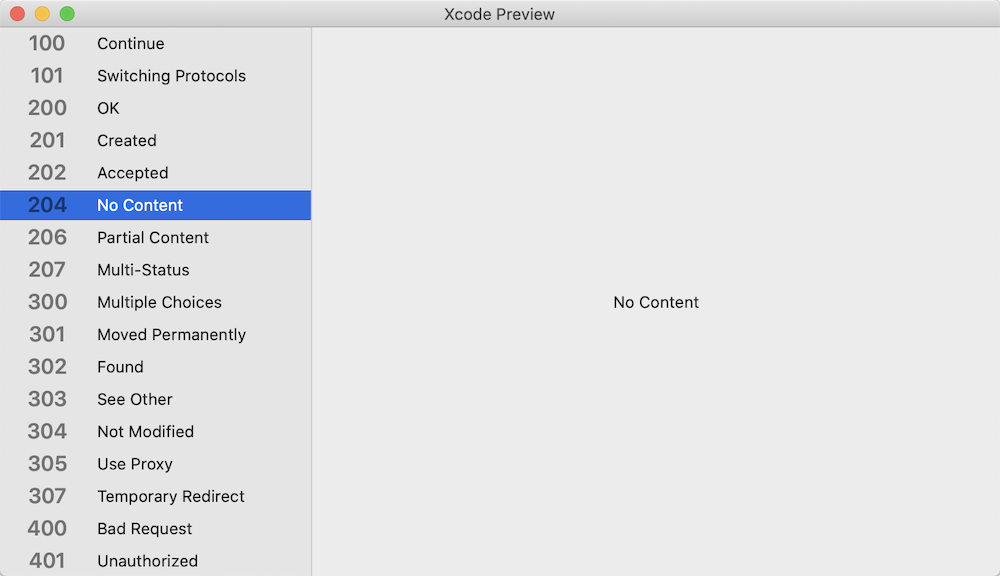
I created an HttpStatus struct with these 2 properties and I borrowed Paul Hudson's excellent Helper Bundle extension to decode the JSON file. For a first attempt, I used the numeric codes to build the list and showed the title of the selected one in the detail view. But one of the best things about SwiftUI is that it makes it so easy to configure table rows, so it is time to create a new View to do this.
After some experimentation, I had a TableRowView that I liked the look of, but the default sidebar width was too narrow and truncated the status code titles, so I added a frame modifier to the List to set a minimum and maximum width for the sidebar.
Outline List
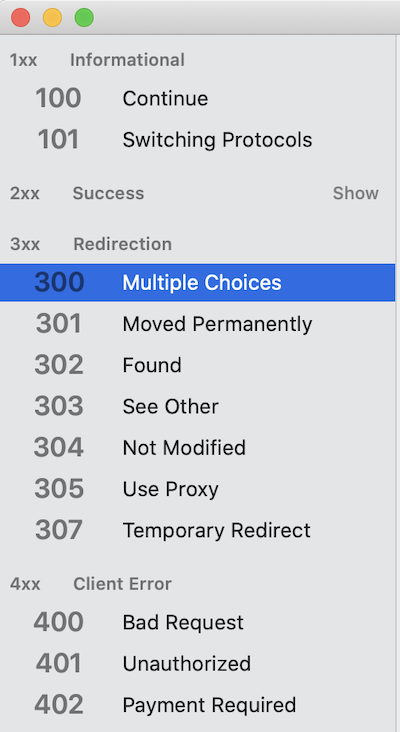
At this point I decided that it would be more useful to have a outline list with the status codes grouped by their category.
So I re-did the JSON file to show this, added an HttpSection struct and a SectionHeaderView and modified the data loading method and @State variable.
[
  {
    "headerCode": "1xx",
    "headerText": "Informational",
    "statuses": [
      {
        "code": "100",
        "title": "Continue"
      },
      {
        "code": "101",
        "title": "Switching Protocols"
      }
    ]
  },
  {
    "headerCode": "2xx",
    "headerText": "Success",
    "statuses": [
      {
        "code": "200",
        "title": "OK"
      },
This worked really well and I was thrilled to find that the sections automatically had Show/Hide toggles!
Detail View
Up until now, I had been using a standard Text view as the destination for my navigation. This is a really useful technique as you can build the interface gradually but have it work from the beginning. But now it was time to create a new view for the details.
I set up the view and added a method that would download the correct cat image when the view appeared but there was no image. After some digging, I realised that sand-boxed Mac apps do not allow network access by default. I went to the Signing & Capabilities section of the target settings and turned on "Outgoing Connections (Client)". And then I had my cat pictures.
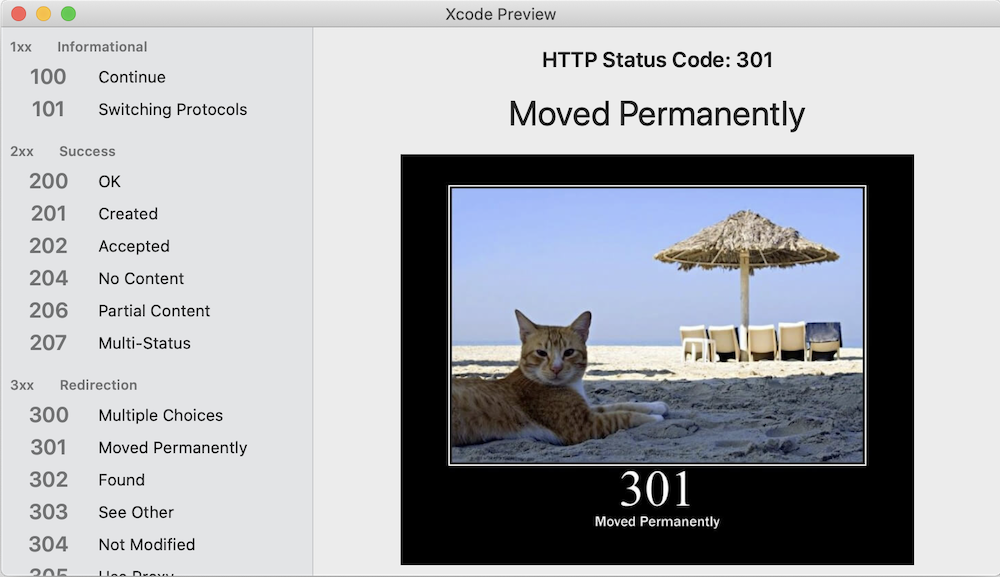
It really should have a loading image to display while the cat image is being downloaded, but to my disappointment, I found that the SF Symbols are not available to a Mac app! But I added a Text view to say "Loading...".
Now that I have a functioning Mac app with a Master-Detail view, the next thing is to explore some more of the challenges that will need to be solved before I can write a Mac app completely using SwiftUI.
If you want to check out the project at this stage, here is a link to the relevant GitHub commit. Or if you would prefer, here is a link to the final version of the project.
In part 2 of this series, I will look into:
- how to interact with the menus
- how to open a secondary window
- more user interface controls
- how to pass data around between windows
