SwiftUI Snapshot Testing
17th May 2020 • 2,104 words • 11 minutes reading time.
Snapshot testing is a technique that has been very popular in the web development world and it seems like a great way to test SwiftUI user interfaces. I read about snapshot tests in a recent blog post and was intrigued, but I had some difficulty getting it to work, so when I finally succeeded, I decided to share my experiences in the hope that others will find them useful.
What is Snapshot Testing
Unit testing checks that when you call various functions or methods with certain inputs, you get the output you expect. I use unit tests for testing my models and the methods that change them. But this only tests the logic behind the app, it does nothing to test whether the app is displaying what it should, or whether it is responding correctly to the user's actions.
UI testing emulates user actions by faking taps, clicks, text entry and so on and checks that labels, buttons etc are showing the correct information after these fake interactions.
Snapshot testing is in between these two as it effectively takes a picture of the interface. The first time you run the test it will store an image and all subsequent test runs will check that the current interface matches this stored image. If there are any differences, the test will fail so you can decide whether to keep the new version or revert to what you had before.
How did I get started?
I first read about the idea of using snapshot testing for SwiftUI in a blog post by Vadim Bulavin. He made a very good argument for this, but I found his instructions assumed more knowledge of the topic than I had at the time and so I discarded the idea after an initial attempt.
But he was suggesting using a snapshotting library published by Point-Free and I later discovered a link to one of their videos where they discuss this exact thing: SwiftUI Snapshot Testing. This was enough to get me going with attempt #2.
Setting up an app for snapshot testing
Since the blog post and video were talking about iOS apps, I decided to start there, but you know me, I will get to macOS apps later...
First off, I created a single view iOS app using SwiftUI making sure to check "Include Unit Tests", but not "Include UI Tests". I created a simple view so I had something to test.
If you want to use this on an app that does not already have a unit tests target, go to the project settings, click the + button to add a new target and choose a Unit Testing Bundle.
Next step was to import the snapshot testing library using Swift Package Manager. Go to File > Swift Packages > Add Package Dependency. Paste in the URL below and click Next.
https://github.com/pointfreeco/swift-snapshot-testingI accepted the default versioning suggestions on the next pane.
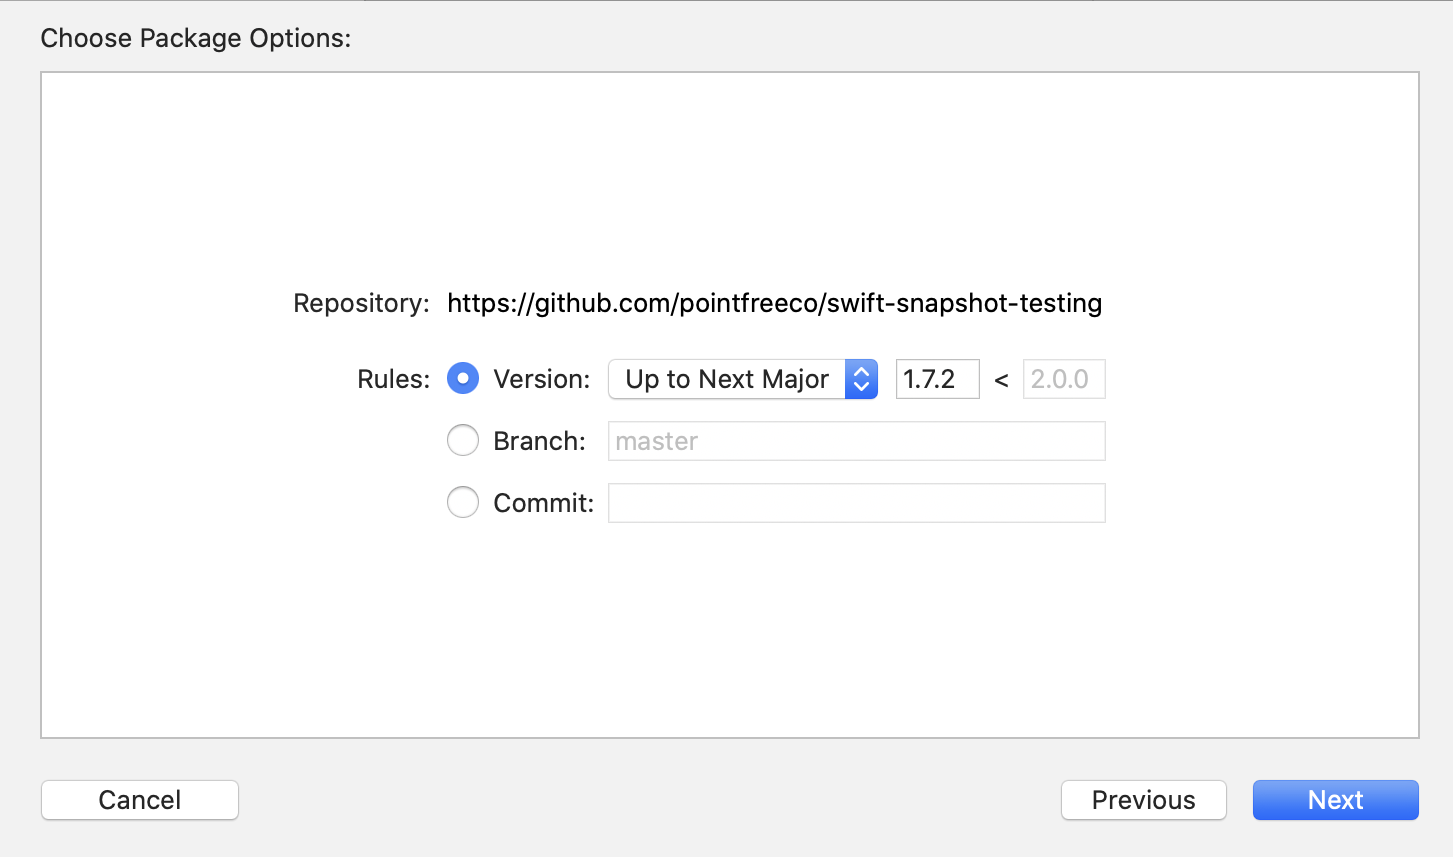
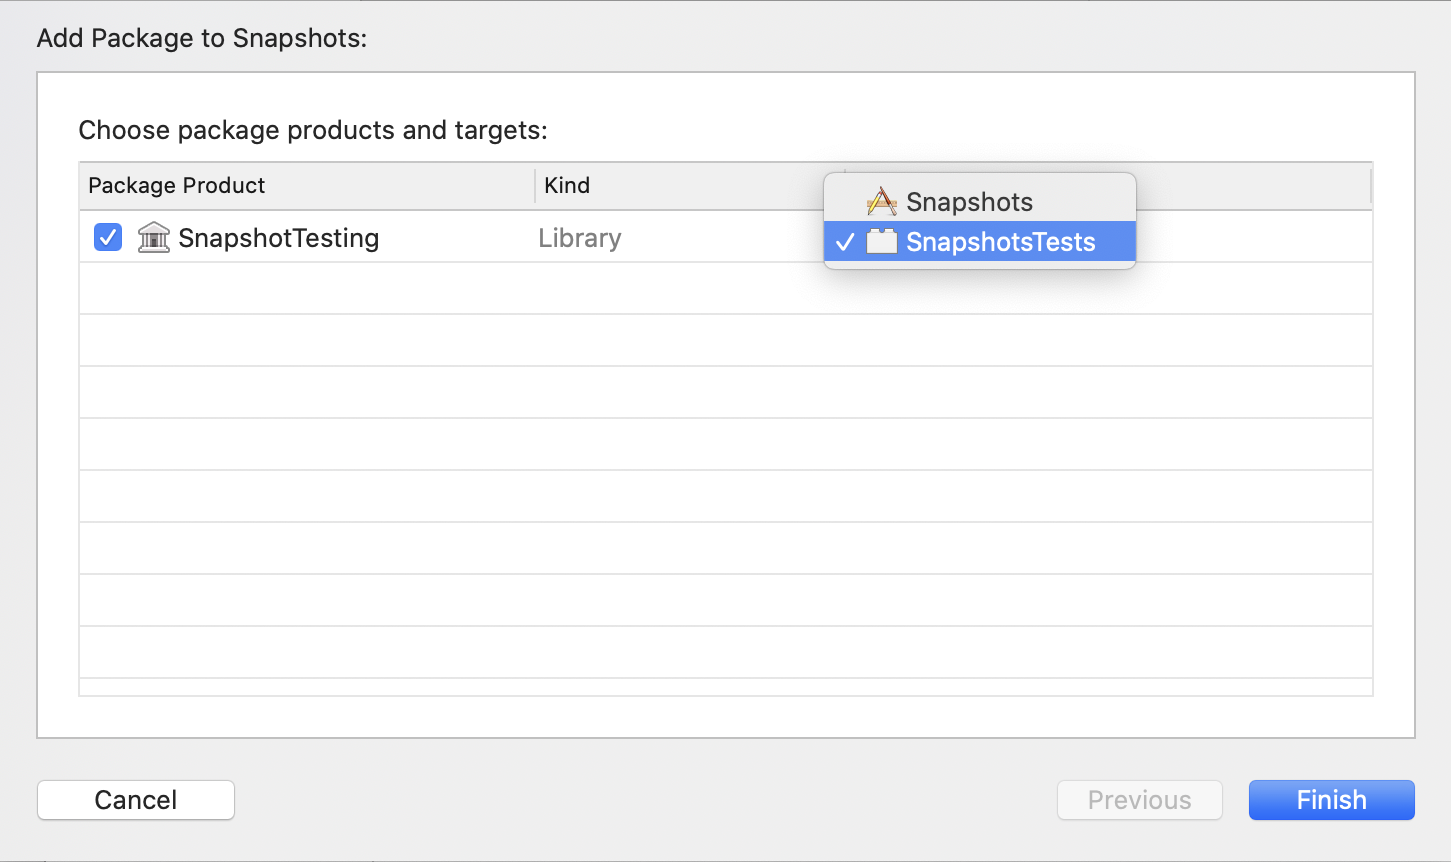
On the final pane, it is important to select the correct target for this package. Select the app's test target, not the app itself and not the UI test target if you have one. I made this mistake on my first try as I assumed that snapshot testing would be part of UI testing but it is actually part of unit testing.
Writing a Snapshot Test
Now I added a new Unit Test Case Class file to the tests target in my app. I had to import SwiftUI and SnapshotTesting into this test file as well as declaring the app as a testable import. The easiest way to do this is to copy the @testable import heading from the sample test file to make sure it is exactly right. The import needs to match the name of your app module.
Finally it's time to write the first snapshot test:
import XCTest
import SnapshotTesting
import SwiftUI
@testable import Snapshots
class SnapshotsTests: XCTestCase {
func testDefaultAppearance() {
let contentView = ContentView()
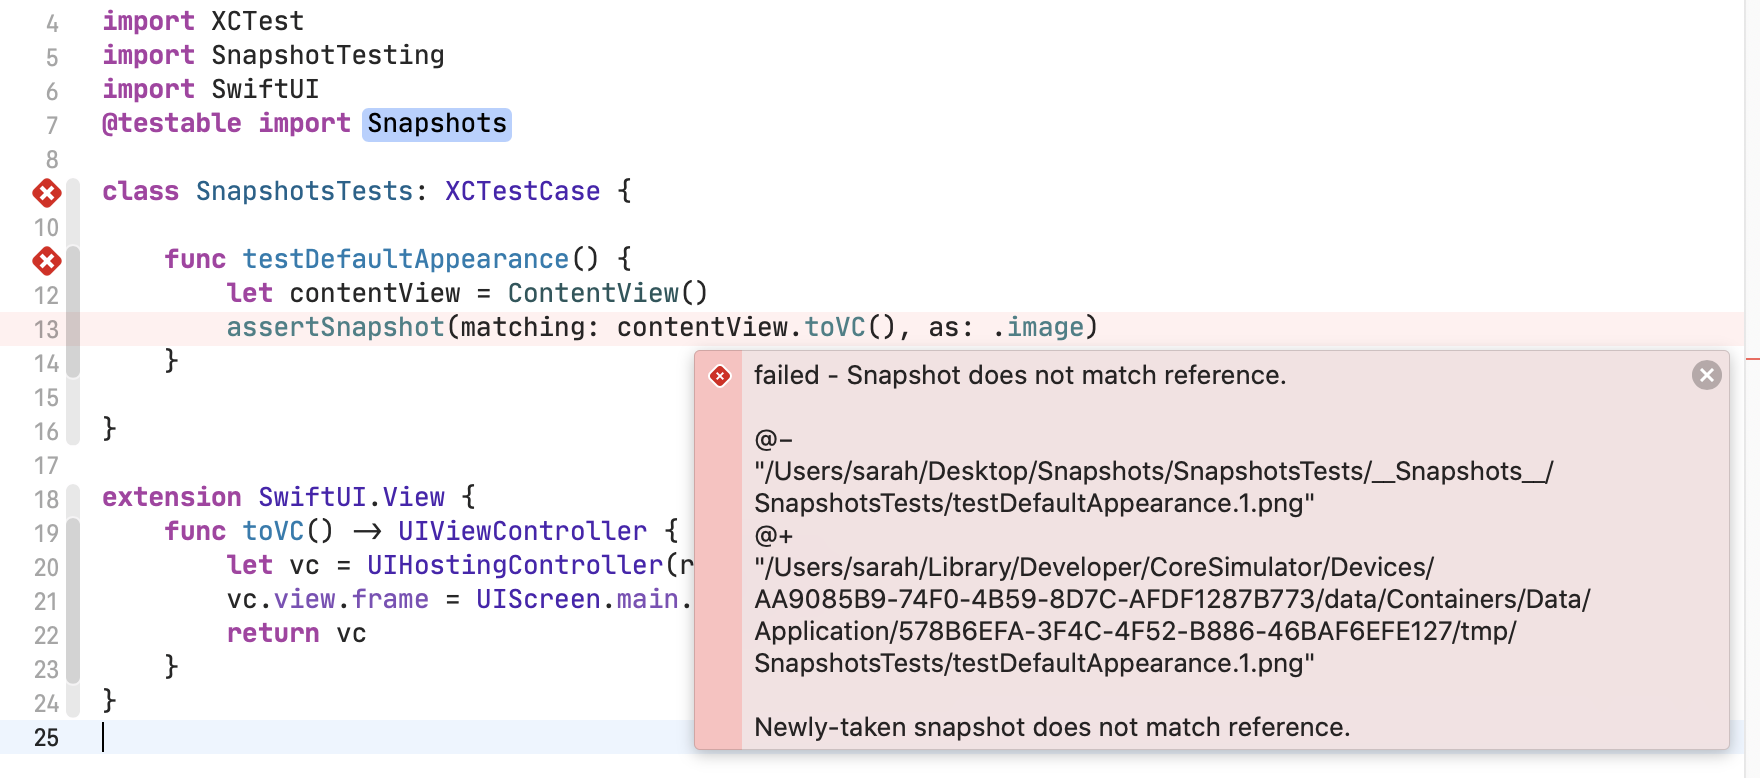
assertSnapshot(matching: contentView, as: .image)
}
}This uses the snapshot library's assertSnapshot method to save the content view as an image. But unfortunately, this doesn't work. The problem is that the second parameter is a Snapshotting strategy that can convert various UI elements into some form of data or image. But the library doesn't know what a SwiftUI View is, so it needs a way to convert the view into something that can be recognized by the snapshotter.
I added this extension to SwiftUI's View that wraps the SwiftUI View in a UIHostingController. It returns this as a UIViewController which is a valid input for a snapshotter and can be converted to an image.
extension SwiftUI.View {
    func toVC() -> UIViewController {
        let vc = UIHostingController(rootView: self)
        vc.view.frame = UIScreen.main.bounds
        return vc
    }
}
Now my first test became:
    func testDefaultAppearance() {
        let contentView = ContentView()
        assertSnapshot(matching: contentView.toVC(), as: .image)
    }
And it worked. Or rather it failed as expected because there was no image to compare it with.
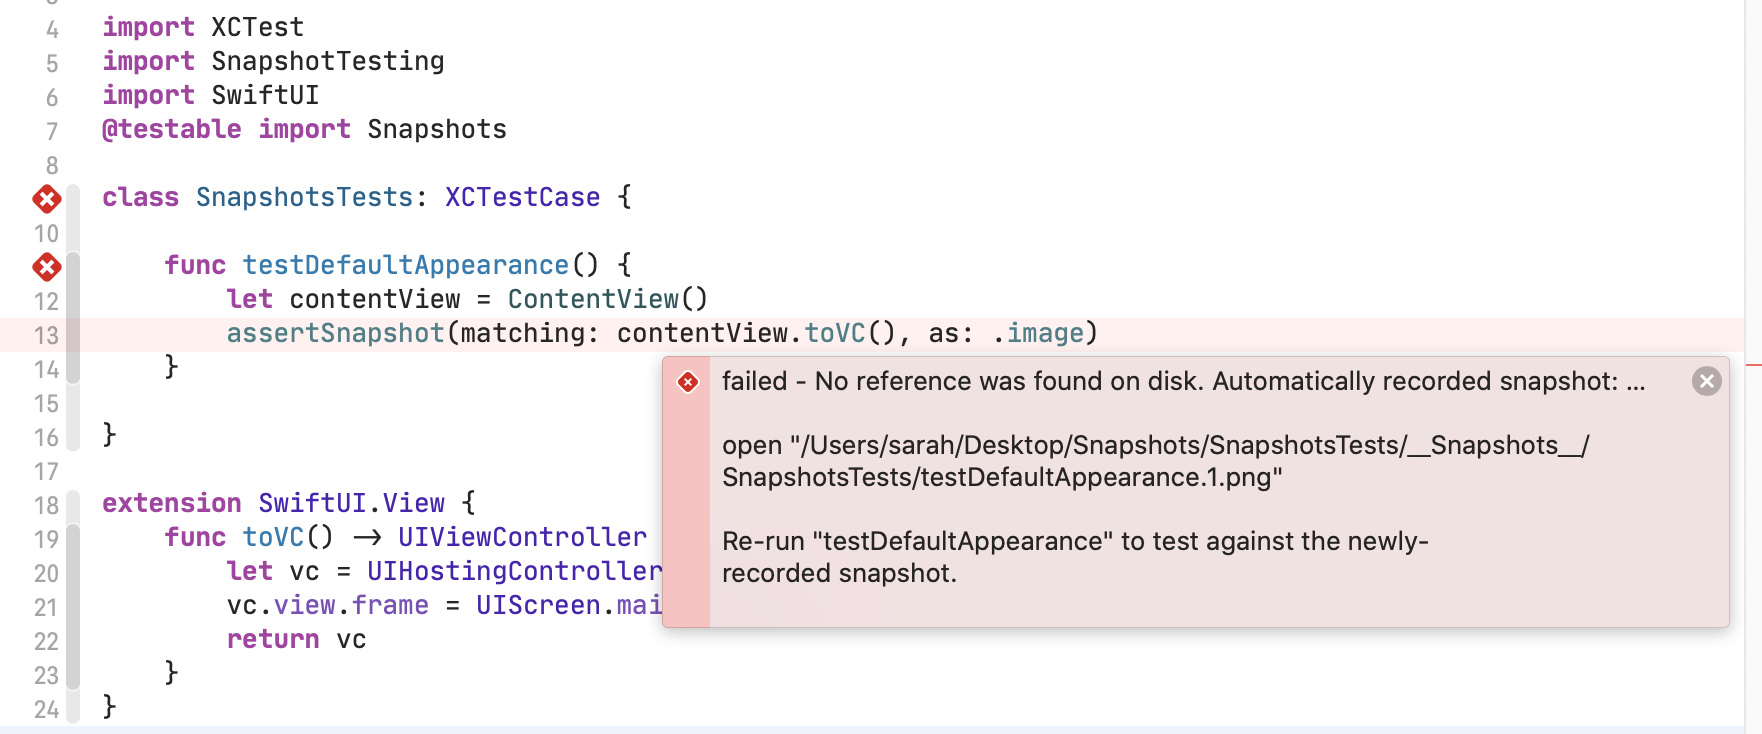
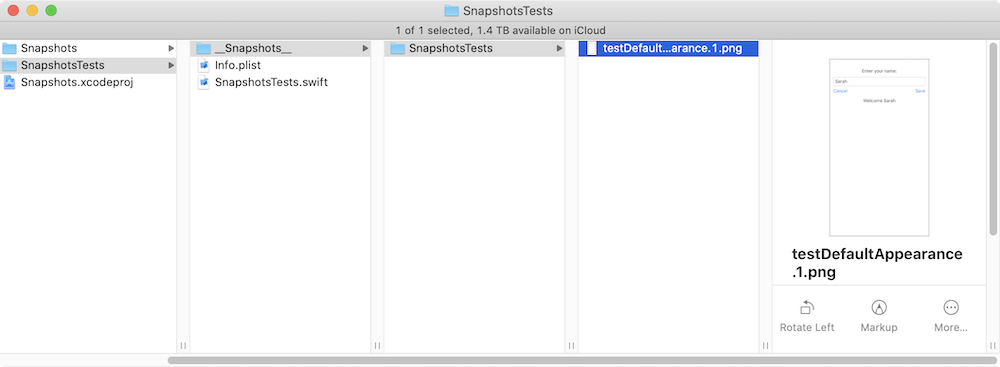
Checking the error message, I was able to see where it had created the snapshot image file which I could look at. And the second time I ran the test, it passed.
If you ever get an error message saying "No such module 'SnapshotTesting'" use Shift-Command-U to re-build for testing. This usually only happens after you have cleaned your build folder.
Testing a Change
Now that I had a passing test, the next thing was to check what happens if the UI changes. This may be due to a deliberate change or because the cat just walked across your keyboard (a not infrequent occurrence around here).
Where I originally had a button with the label "Save", I decided to change this to "OK" (rejecting the cat's suggestion of "q2eegrnh").
Running the test again produced this result:
And I was then able to compare the 2 images, using the path to the failing image from the error message.
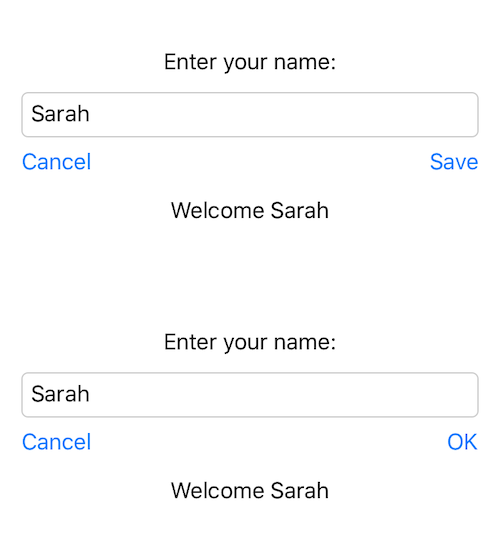
Once I had confirmed that the new image was what I wanted and not a result of error, either feline or human, I set the test to record a new result so that the new version became the official test version.
    func testDefaultAppearance() {
        let contentView = ContentView()

        record = true
        assertSnapshot(matching: contentView.toVC(), as: .image)
    }
This caused a failing test again as the new version was written to the Snapshots folder, but after removing the record = true line and re-running the test, it passed again, with my new button label now an accepted part of the test.
Using Snapshots with State
In SwiftUI, the UI displayed is a function of state, so changing state properties changes the UI. This is what makes snapshot testing really good for SwiftUI apps as you can change the state programmatically and confirm that this is reflected in the UI.
So having proved that the snapshot tests worked, I decided to move on and test it with my new anagram assistant app. This is quite a simple app that has a single AppState class that holds all the program data.
So I was able to write a suite of tests that changed the state in various ways and then snap-shotted the UI with that state. Here are a couple of examples:
    func testEmptyContentView() {
        let contentView = ContentView()
        assertSnapshot(matching: contentView.toVC(), as: .image)
    }

    func testAfterLocking() {
        var contentView = ContentView()

        let appState = AppState.sampleState()
        appState.availableLetters.sort()
        appState.selectedLetterIndex = 1
        appState.placeSelectedLetter(at: 3)
        appState.toggleLockedState()
        appState.availableLetters.sort()

        contentView.appState = appState
        assertSnapshot(matching: contentView.toVC(), as: .image)
    }
This worked really well with only one slight problem. As the state arranges the availableLetters array randomly for display, I had to add a sort to make sure they always displayed in the same order and made the tests repeatable.
And as a bonus, I was able to test a screen in dark mode with this test which sets the colorScheme:
    func testDarkMode() {
        var contentView = ContentView()
        contentView.appState = sampleAppState()

        assertSnapshot(
            matching: contentView.colorScheme(.dark).toVC(),
            as: .image)
    }
Accessibility Tests
iOS supports dynamic type and if your app uses standard font styles, it will adopt these dynamic sizes automatically. I can't find the link right now, but I remember reading an article that said nearly half of all iPhone users change the default text size, setting it either smaller or larger.
With snapshot testing, it is quick and easy to get a view of how you app looks with different font sizes. Here is my test function for taking a snapshot of every possible font size variation.
    func testDynamicFonts() {
        var contentView = ContentView()
        contentView.appState = sampleAppState()

        for contentSize in ContentSizeCategory.allCases {
            assertSnapshot(matching: contentView.environment(\.sizeCategory, contentSize).toVC(),
                           as: .image,
                           named: "\(contentSize)")
        }
    }
For the settings screen, I decided that smaller fonts were not a problem, but I wanted to check the two largest options, so I used this test function:
    func testSettingsScreen() {
        let settingsView = SettingsView()
        assertSnapshot(matching: settingsView.toVC(), as: .image)

        assertSnapshot(
            matching: settingsView.environment(
                \.sizeCategory, ContentSizeCategory.accessibilityExtraExtraExtraLarge
            ).toVC(),
            as: .image,
            named: "AccessibilityXXXL")

        assertSnapshot(
            matching: settingsView.environment(
                \.sizeCategory, ContentSizeCategory.extraExtraExtraLarge
            ).toVC(),
            as: .image,
            named: "XXXL")
    }
This let me quickly see where the problems were and what I needed to adjust.
Snapshot Test for Mac Apps
You knew you weren't going to get through this without me going on about Mac apps...
Snapshot tests for a Mac app work well, with one caveat.
First I had to change the Swift.View extension so that it returned an NSViewController instead of a UIViewController.
extension SwiftUI.View {
    func toVC() -> NSViewController {
        let vc = NSHostingController(rootView: self)
        vc.view.frame = CGRect(x: 0, y: 0, width: 1024, height: 768)
        return vc
    }
}
I chose an arbitrary size for the snapshot, you just need to make sure your UI will fit into whatever size you select.
The real problem was with sand-boxing. The snapshot library was blocked from writing the image files to the project directory if the app was sand-boxed. This seems really peculiar, since Xcode is running the tests and Xcode writes to the project directory all the time!
I found two ways around this:
- Turn off sand-box mode temporarily while testing.
- Make a non-sand-boxed target and use it for testing against.
Neither of these are particularly great. Option 1 is tedious, although I think it can work if the snapshots remain the same, it only fails if there is a change that it needs to write to disk.
Option 2 is tedious to set up (contact me if you would like more details) but is more seamless after that.
The best solution would be for Xcode to allow you to turn off sand-boxing for a test target. Maybe Xcode 12...
Limitations of Snapshot Testing
Ignoring the Mac and concentrating only on iOS apps for the moment, there were a few issues:
-
You have to run your tests against the same simulator every time, or at least against a simulator with the same screen dimensions. I decided to to use the iPhone SE (2nd generation) as it has a small screen and I find smaller screens to be more of a problem than large ones. You also need to make sure it is always using the same appearance: light or dark, unless you want to specify this for every test.
I ended up with this setup function that ran before my snapshot test suite:
    static override func setUp() {
        let device = UIDevice.current.name
        if device != "iPhone SE (2nd generation)" {
            fatalError("Switch to using iPhone SE (2nd generation) for these tests.")
        }

        UIView.setAnimationsEnabled(false)
        UIApplication.shared.windows.first?.layer.speed = 100

        record = false
    }
This uses a couple of tricks that are supposed to speed up tests and has a record setting that I could set for the entire suite if I wished, and it throws a fatalError if I select the wrong device or simulator.
It would be neater if Xcode allowed you to select a simulator in the test target build settings, but I think you can only do this if you run tests from the command line.
-
Snapshot tests confirm that the UI matches the state, but they do not check to see if the state changes in response to user input. That is the missing link that UI testing provides, but even without that, I believe that snapshot testing is a very useful tool and much better than having no form of UI testing at all.
-
You need to look at your snapshots. This may sound obvious but the snapshot library creates a set of images. These images are then set as the goal for future tests. If you don't check that they are correct, then every test could be confirming that the UI is wrong but unchanged. If the tests report a difference, look at both copies and see which one is right. For the same reason, the snapshot images need to be included in your version control repository.
Summary
Will I use snapshot tests for my SwiftUI apps? Yes, definitely. I use unit tests for my model classes but mostly avoid UI tests as they are too clumsy to write and time-consuming to run. Snapshot tests are better for SwiftUI, and very fast.
Huge thanks to Vadim Bualvin for the original inspiration for this article. Go and read his blog post for a more detailed look. And thanks to Brandon Williams & Stephen Celis at Point-Free for getting me going after my initial discarding of the idea. Any mistakes or errors are mine and not theirs.
If you want to learn about UI testing for SwiftUI apps, I recommend watching azamsharp's YouTube video: User Interface Testing for SwiftUI Applications.
As always, if you have any comments, suggestions or ideas, I would love to hear from you. Please contact me using one of the links below or through my Contact page.