Custom Fonts in iOS & macOS apps
1st April 2020 • 1,292 words • 6 minutes reading time.
As a rule, I prefer to use fonts that come pre-installed with the system. That means that your interface is already familiar to users, you get dynamic font sizing and if Apple updates the fonts, you get the updates without doing anything.
But sometimes, you really need to use a different font in your apps, and as the process of getting a custom font to display in your app can be confusing and tedious, I thought I would go through the steps for both iOS and macOS apps.
I probably should have published this on a different day, but it is not a joke.... really.
Getting a Font File
The first thing is to find a suitable font and make sure that the license for that font matches your use. I wanted a font that looked like it was hand-written, so I went to fontspace and searched the hand-writing category there.
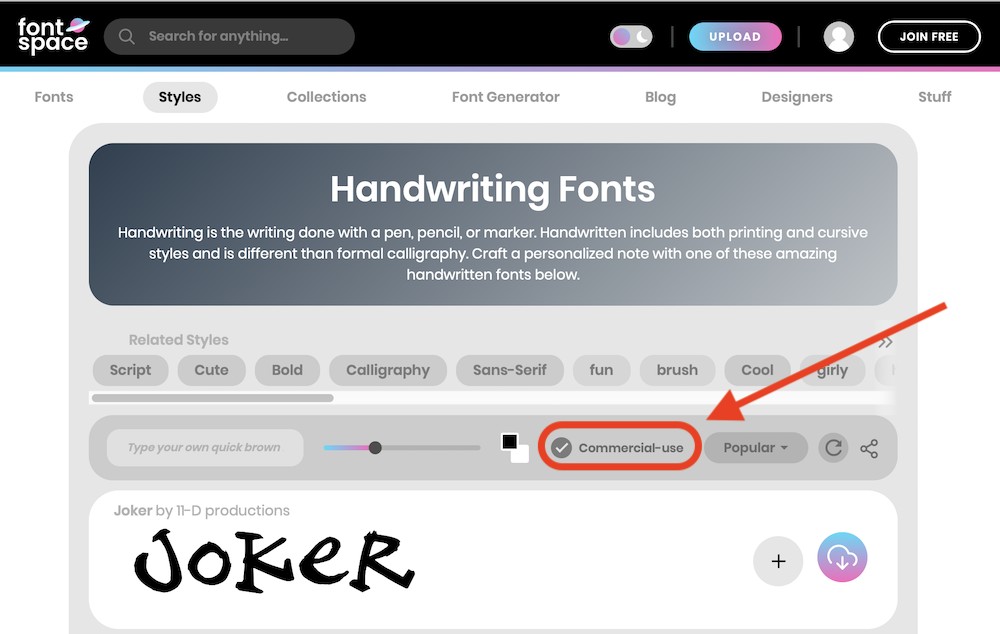
Since I wanted to use this in a paid app, I checked the "Commercial-use" button to limit the search. The one I chose was called "Painting With Chocolate" by "Make mooze"

I downloaded the font and un-zipped the file which gave me a single file called "Paintingwithchocolate-K5mo.ttf". You can use either ".ttf" or ".otf" font files.
Using the Font in an iOS App
Now to use the font, first in an iOS app. Boot up Xcode and create a new SwiftUI project for iOS.
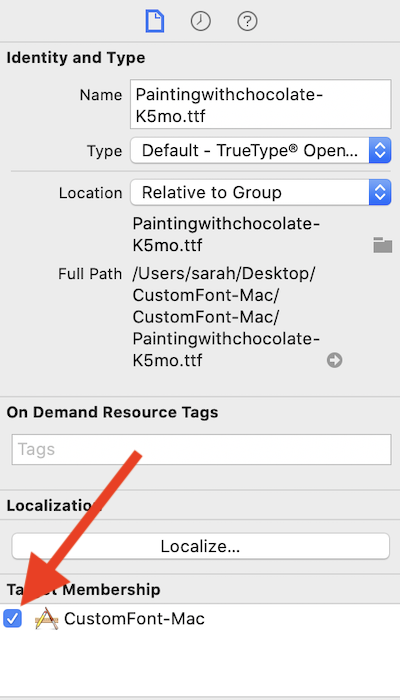
Once the project is open, drag the font file into the Project Navigator. At this stage there are 2 crucial settings:
- Check "Copy files if needed".
- Check your app in the "Add to targets" section.
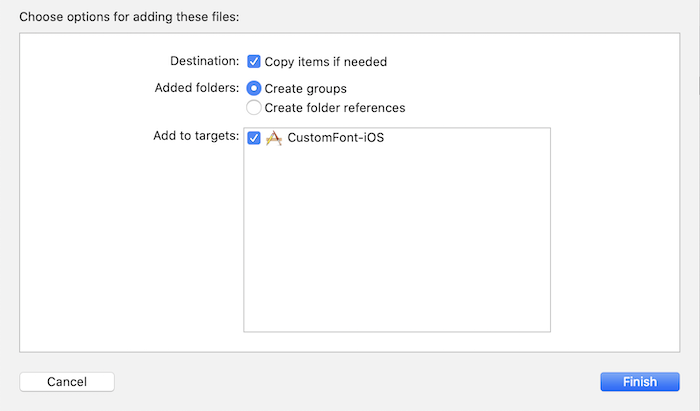
In one of my tests, the file stayed in the Downloads folder even after checking "Copy files", so I deleted the reference, manually moved the font file to my project folder and added it again.
Now the font file is in the project but there is still more work to do.
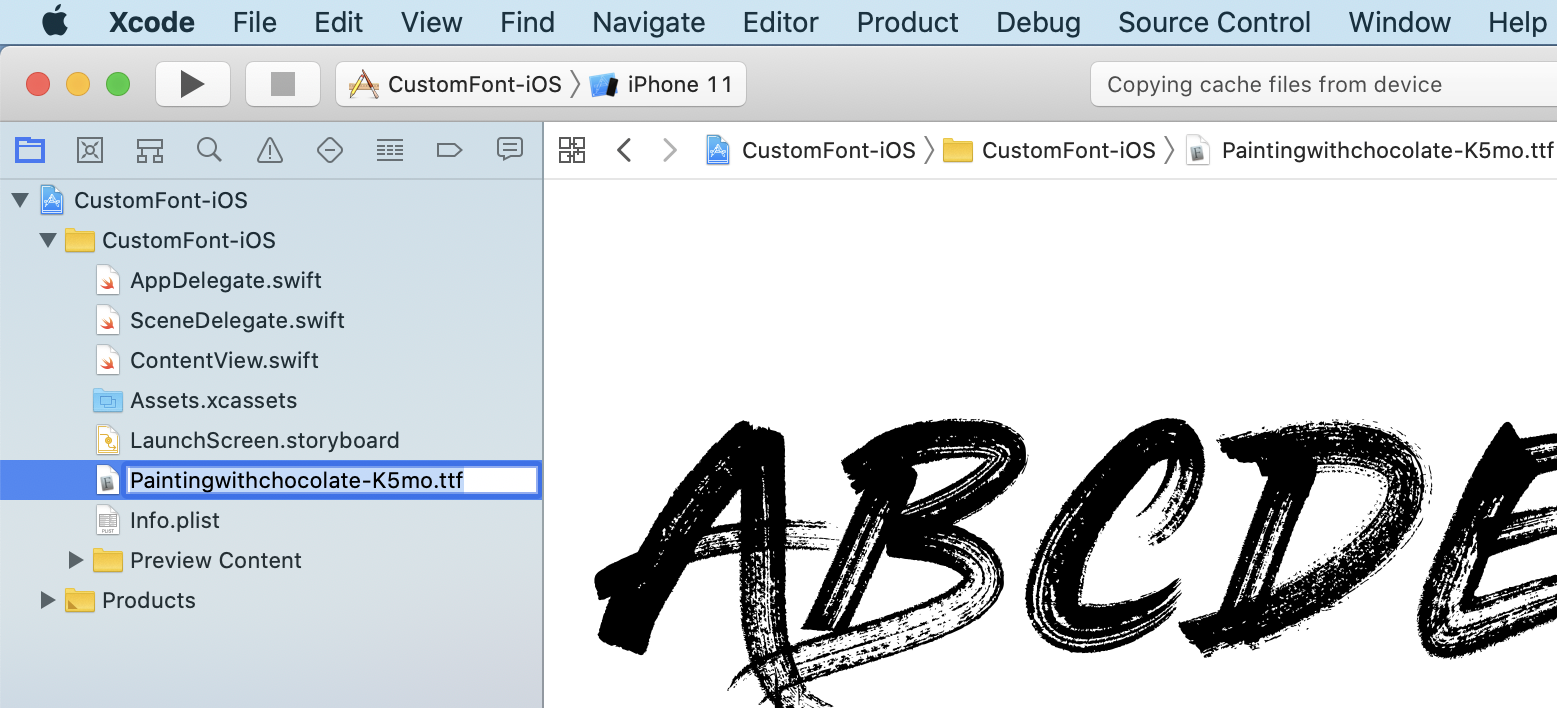
Select the font file in the Project Navigator. Press Return as if you are going to edit the name. Select the complete file name, including the file extension and copy it.
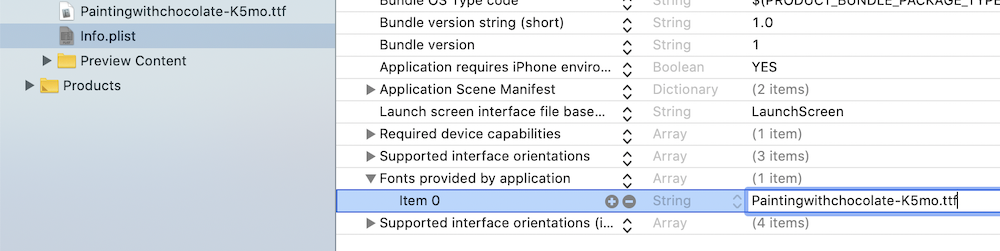
Now go to the Info.plist file. Right-click in the blank space below the existing entries and select "Add Row" from the popup menu. In the box that appears, start typing "Font" using an upper-case "F". When you see "Fonts provided by application", select that.
This entry is an array. Click the disclosure triangle to the left and you should see "Item 0" appear. Paste the name of your font file, including the file extension, into the value for "Item 0".
Your app now has a font file and knows to make it available. But you aren't finished yet.
To use a custom font, you need to know its exact name. In SwiftUI, the code will be something like this:
  Text("Hello, World!")
      .font(.custom("Font-Name-Goes-Here", size: 14))
But the exact name is not always obvious and is rarely the file name. So the best thing to do is to ask the app what fonts it now has available. This will also act as confirmation that the font file is being included correctly in your project.
To get the app to list all its fonts, I used this:
struct ContentView: View {
    var body: some View {
        Text("Hello, World!")
            .onAppear { self.listInstalledFonts() }
    }

    func listInstalledFonts() {
        let fontFamilies = UIFont.familyNames.sorted()
        for family in fontFamilies {
            print(family)
            for font in UIFont.fontNames(forFamilyName: family).sorted() {
                print("\t\(font)")
            }
        }
    }
}
You can run the app in the Simulator or use "Debug Preview" to make this show up in the console, but once you have the list, scroll through in until you find the font you just added. The headers are the names of font families and the indented entries are the font names themselves.

This time I found that the name of the font was quite obvious: "PaintingWithChocolate" but this is not always the case. And if the font has any variants, you will need to use the complete name e.g. "Optima-ExtraBlack"
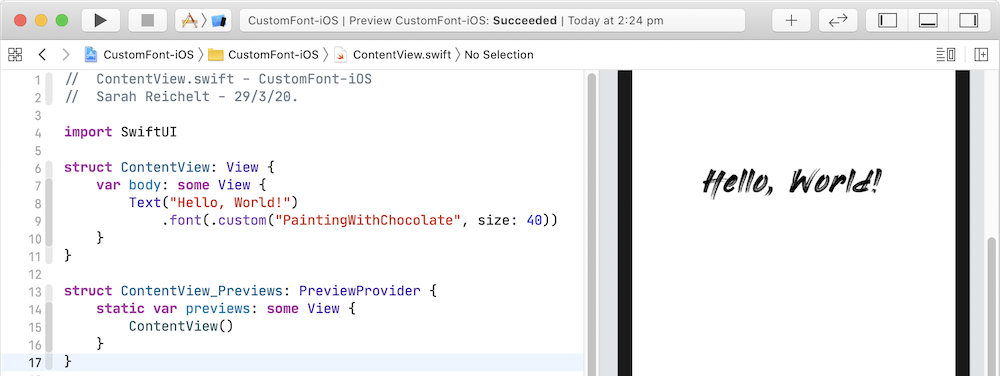
With the name of the font, you are finally able to use it in the app, like this:
struct ContentView: View {
    var body: some View {
        Text("Hello, World!")
            .font(.custom("PaintingWithChocolate", size: 40))
    }
}
Using the Font in a Mac App
The process for a Mac app is mostly the same.
Install the font file in your project as before, making sure to copy the file into the project and to add it to the app target.
For a Mac app, you do not need to specify the font file name in your Info.plist file. Instead, you have to tell the Info.plist where to look for custom fonts in your project directory.
Open your Info.plist, right-click in the blank space below the existing entries and select "Add Row" from the popup menu. Start typing "Application" using an upper-case "A". When you see "Application fonts resource path", select that and enter a period as the value. A period or full-stop tells Xcode that you mean the current directory but even if you have your fonts in a sub-directory, this seems to work.

You do not need to set "Fonts provided by application" for a Mac app, although if I had a problem, I would set it as I feel that this is something that Apple may add at some stage.
While I was using the same font for both apps and so already had the exact name, you may still need to check the list of installed fonts in a Mac app. The function for doing that is quite different:
  func listInstalledFonts() {
      let fontFamilies = NSFontManager.shared.availableFontFamilies.sorted()
      for family in fontFamilies {
          print(family)
          let familyFonts = NSFontManager.shared.availableMembers(ofFontFamily: family)
          if let fonts = familyFonts {
              for font in fonts {
                print("\t\(font)")
              }
          }
      }
  }
The format of the print-out is different too, but you can see where I have selected the exact name to use.

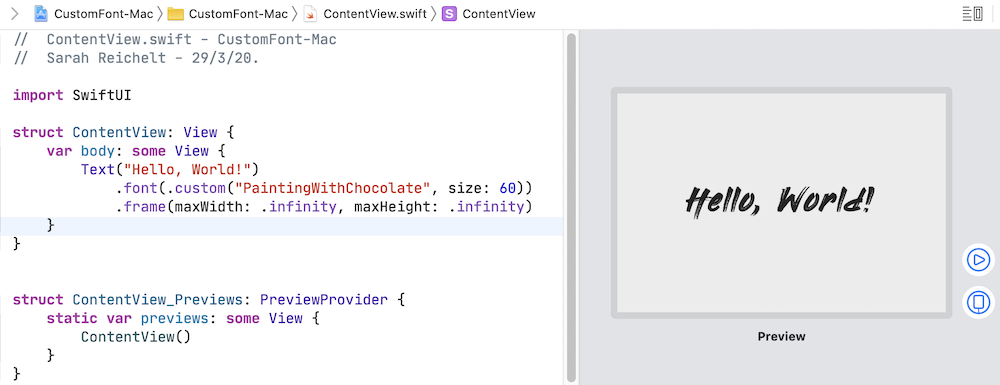
Then the SwiftUI code for using the font was just the same:
struct ContentView: View {
    var body: some View {
        Text("Hello, World!")
            .font(.custom("PaintingWithChocolate", size: 60))
            .frame(maxWidth: .infinity, maxHeight: .infinity)
    }
}
Storyboard apps
The examples above were both SwiftUI projects, but these techniques work much the same in a storyboard project.
Follow the same steps to install the font and configure the Info.plist file and use the same functions to list the installed files.
To use the fonts, if you are using a storyboard in an iOS project, select "Custom" in the font picker and then you will be able to see your custom font listed if it is installed correctly. I could not work out how to get the custom font appearing in this menu for a macOS app.
To apply the font programmatically, you can use something like this:
    // iOS
    fontLabel.font = UIFont(name: "PaintingWithChocolate", size: 36)

    // macOS
    fontLabel.font = NSFont(name: "PaintingWithChocolate", size: 24)
Trouble-shooting
If you have gone through these steps and the font still isn't working, here are a few things to check:
-
Is the font file's target membership set to the app?
-
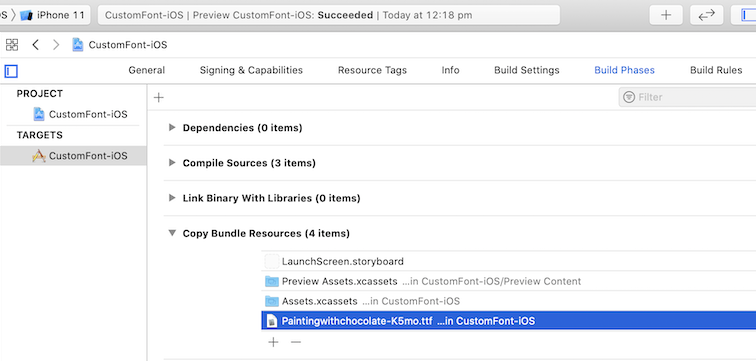
Is the font file being included in the "Copy Bundle Resources" build phase? If not, drag it in manually from the Project Navigator.
-
iOS Info.plist - is there a typo in the "Fonts provided by application" setting? Copy the file name and paste it in directly rather than trying to re-type it.
-
macOS Info.plist- have you put a single period "." in the "Application fonts resource path" setting?
-
Run the font name listing utility - does the font show up there?
-
Have you used the font name EXACTLY as shown in the font listing? Copy & paste it from the font list.
Having struggled with various of these steps myself recently, I thought it was worth documenting it. I am sure that future me will be grateful, but hopefully others will find it useful also.
If you have any suggestions, corrections or improvements, please contact me using one of the links below or though the Contact page.