Workflow for writing a post
10th March 2015 • 787 words • 4 minutes reading time.
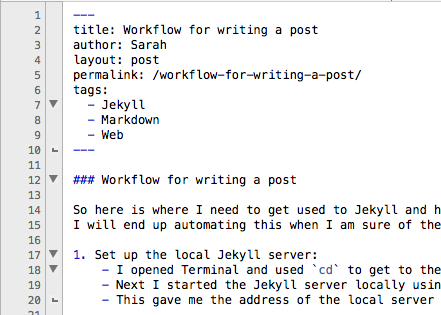
So here is where I need to get used to Jekyll and how things are done. I will end up automating this when I am sure of the process, but for now, I am just going to work my way through it.
-
Start up the local Jekyll server:
- I opened Terminal and used
cdto get to the folder containing my site. - Next I started the Jekyll server locally using
jekyll serve. - This gave me the address of the local server - in my case
http://127.0.0.1:4000/- so I went there in my browser to see the default page.
- I opened Terminal and used
-
My goal is to write a new blog post (this one in fact).
- For advice on creating a new post, I went to the Jekyll docs.
- Jekyll needs the file name to be a specific format which includes the date and title.
- Looking in the
_postsfolder of the site folder, I see the previous post file is titled2015-03-08-new-site-for-trozware.md. - As it is now 10th March 2015, I am saving this file as:
2015-03-10-workflow-for-writing-a-post.md. - Saving at this point shows a Jekyll error in the Terminal, but the next stage will fix that.
-
Front matter:
- Jekyll specifies that each file must have a front matter block in a certain format.
- The header has certain essential parameters and then more optional ones.
- My site was imported from WordPress, so the older posts contain several header parameters that may not be necessary any more.
- Look at the screen shot below to see what I have in this post file:
- After saving, I see this entry in my Terminal:
Regenerating: 1 file(s) changed at 2015-03-10 13:50:40 ...done in 0.421789 seconds.- Now I can see the title and the start of the post on my first page and when clicking on it, I can see all the text.
-
Adding an image:
- This is not really necessary for this post, but I wanted to document it as part of the workflow.
- I wanted to show the front matter and start of this post, so I took a screen shot of the top of my editor window.
- Then I renamed the image file and moved it into the
imagesfolder of my site. - Now to embed the image using this Markdown:
![Post header][2] - As you can see, I prefer to group all links (images & URLs) at the end of the document and keep the body of the text as clean as possible.
-
Proofing:
- Now that I have the text of my post, I need to proof-read it from the local Jekyll server.
- The
jekyll servecommand running in Terminal keeps the pages up-to-date as you edit, but you will need to refresh your page in the browser manually to check your changes. - And I have found that if you make a major change to the site e.g. a CSS file or a config file, then it is best to stop the Jekyll server and start it again to make it re-build all the files.
- To be completely sure, stop the server and run
jekyll buildin Terminal although this may only do whatjekyll servedoes on startup anyway.
-
Publishing:
- Now it is time to publish.
- As I am using GitHub Pages to host, the site files are all part of a single Git repository.
- And as I understand it, the data must be in the
masterbranch. - Opening up the GitHub client, I see that my repository has a bunch of changes: - the file I am working on - the image I inserted - feed.xml - index.html files for each page
- This is as expected, since all pages are pre-generated when using Jekyll, so pages of posts must be re-rendered when a new post is added to the top.
- Note that several of the files appear twice: once from where they are edited and once from the _site folder which serves them.
- Just two simple steps now, using the GitHub client: 1. Commit 2. Sync
- And that's it. My new post is online and ready for reading.
-
Summary:
- This was my first post after the one I wrote when setting up, so the first real post.
- While there appear to be a lot of steps, none of them are difficult.
- But I do have 4 apps running to do it: 1. TextWrangler for editing 1. Terminal to run the local Jekyll server 1. Safari to check the finished post 1. GitHub to commit and upload
- Automating this is an obvious next step, so stay tuned...